How to convert images to PDF: a step-by-step guide
Make one PDF or separate PDFs from PNG, JPG and WebP images. Follow real PixToPaper screenshots to arrange pages, choose settings, preview and download.
By PixToPaper Team. Published . Updated .
On this page
Choose images → arrange them → preview → create → download. That is the whole basic workflow. You can leave the advanced settings alone for your first screen-viewing PDF.
Open PixToPaper in a modern browser. No converter account, subscription or installation is needed. Your selected images and generated PDFs stay in the browser; the converter does not upload them. The screenshots in this guide show made-up demonstration files, not visitors’ documents.
1. Choose your images
Select Choose images, then choose PNG, JPG, JPEG or WebP files from your device. On a computer, you can also drag files into the dashed area. On a phone or tablet, use the file or photo picker offered by your browser.
You can mix the supported formats. Each image becomes one PDF page. GIF, HEIC and existing PDF files are not supported inputs; export a supported image format from your device first if necessary.
Start with a few files, especially on a phone. The tool accepts up to 50 MB and 40 megapixels per image, with session limits of 100 images and 250 MB of input files. Your device may need a smaller batch even below those limits. Keep the original files separately.
2. Put the pages in order
Keep PDF output set to Single PDF — all images together for one document. The image cards show the page order.
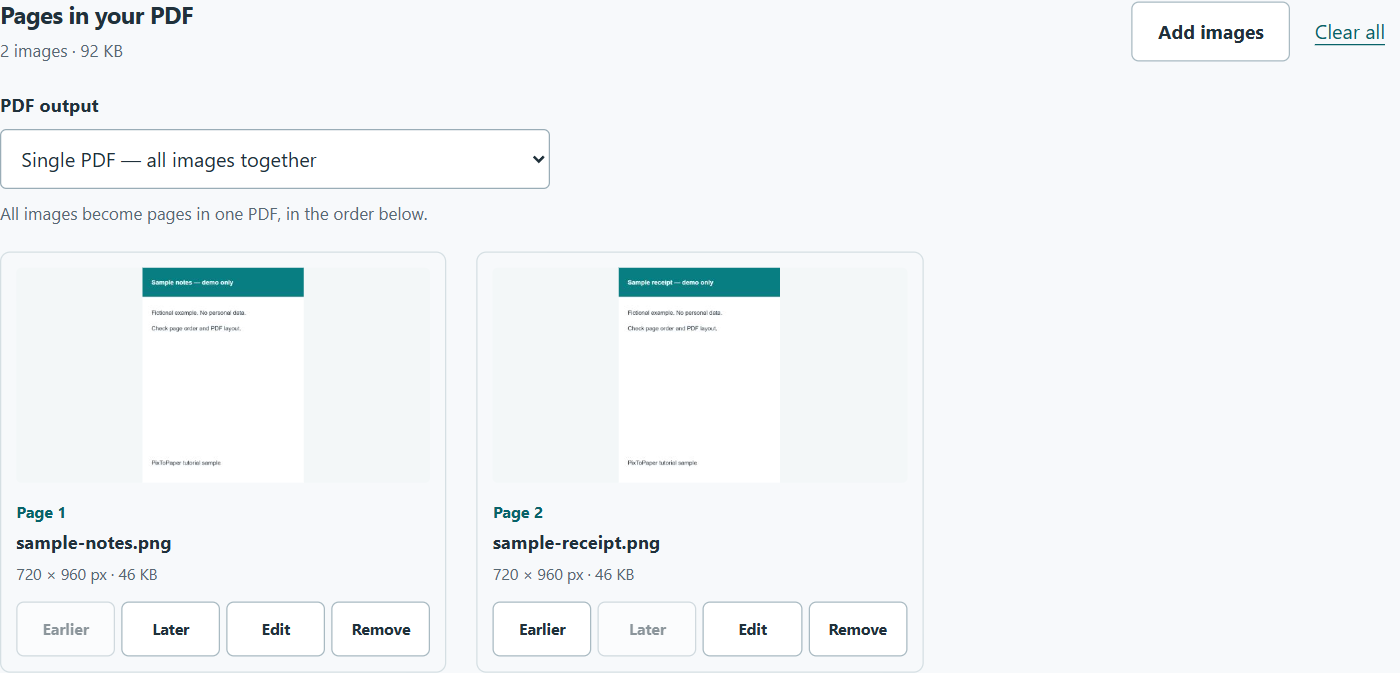
- Select Earlier or Later on an image card to move that page.
- Select Remove to leave a particular image out.
- Select Add images to include more files.
- Select Edit only if you need to crop, rotate or flip an image.
In the editor, drag a crop edge or corner to resize the crop, or drag inside it to move it. You can also choose a Crop shape preset. Keyboard users can focus a crop control and use arrow keys; Shift + arrows makes larger adjustments. Select Apply edits to use the changes, or Cancel to leave the image unchanged. Reset edits returns to the full original image. Editing never overwrites your source file.
3. Choose settings only if you need them
Open PDF settings when your recipient or printer needs a particular layout.
| What you need | Useful starting settings |
|---|---|
| A PDF mainly viewed on screen | Page size: Match each image; Orientation: Automatic; Margins: 0. |
| A document to print | Choose A4 or US Letter to match the paper; use Fit the whole image and check the margins. |
| Screenshots or small text | Image quality: Lossless — larger file to avoid JPEG compression. |
| Photos with a smaller download | Start with High — balanced size, or try Compact — smaller file and inspect the downloaded result. |
Fit the whole image keeps every edge visible inside the margins. Fill the page can crop the edges to fill that area, so avoid it when a receipt total, label or signature must remain visible. Margins are entered in millimetres, not percentages; 10 is a useful example border, not a guarantee about your printer.
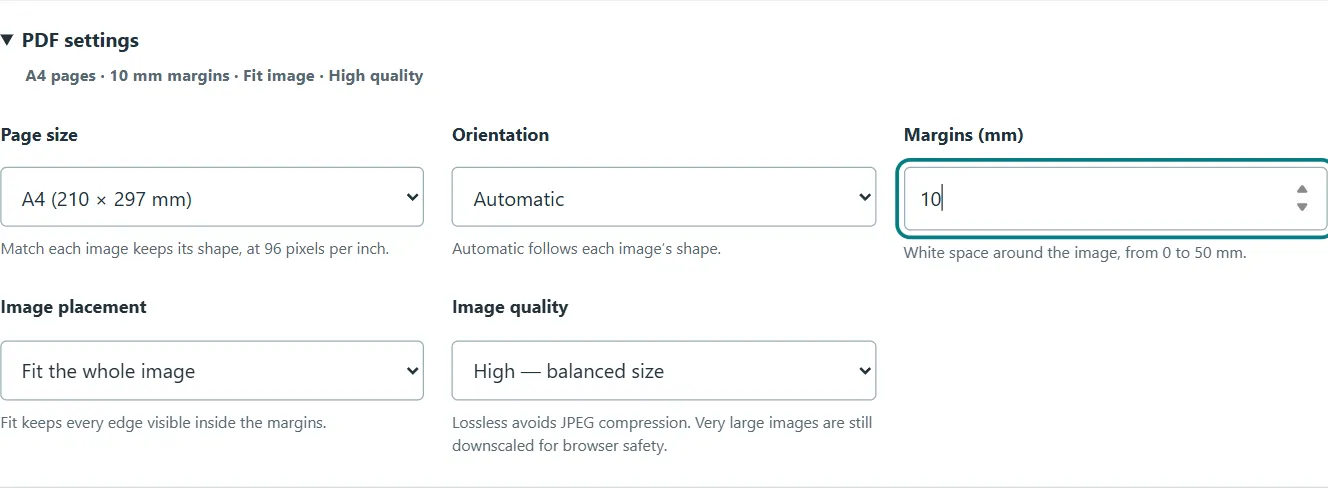
Read PNG vs JPG and export quality or A4 vs Letter and page layout if you need help choosing. Conversion cannot recover detail from a blurry source, and very large images may be downscaled for browser safety.
4. Preview every page
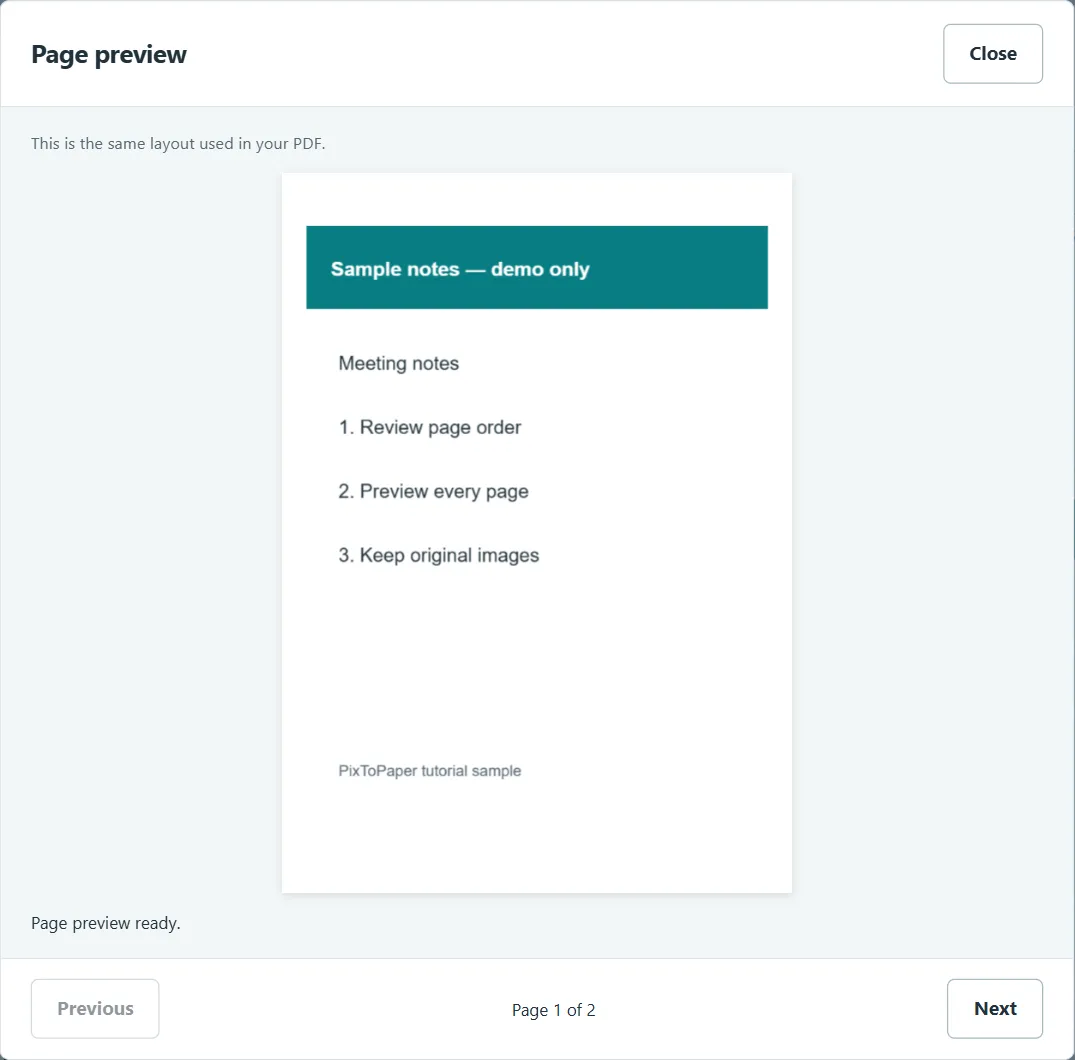
Select Preview pages. Use Next and Previous to check the page order and layout. Look for missing edges, unexpected white space, sideways pages or text that is too small. Select Close to return to the workspace and adjust the settings if needed.
The preview shows the page layout. It is not a substitute for checking the final downloaded PDF’s compression and readability.
5. Create and download your PDF
Select Create PDF and wait for Your PDF is ready. Then select Download PDF. Creating a PDF prepares it in browser memory; it is saved only when you use the download link.
The combined PDF uses the first image’s name with a -pixtopaper suffix. For example, sample-notes.png becomes sample-notes-pixtopaper.pdf. The file size shown is for your actual result, not a promised compression ratio.
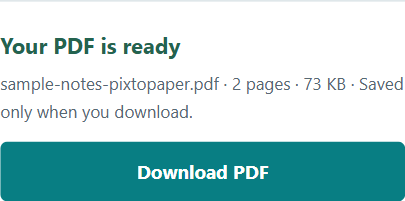
On some phones, the browser opens the PDF instead of immediately saving it. Use the browser or PDF viewer’s download, share or Save to Files option. The browser controls the final save location. Keep the tab open until you have saved the result, then open it to inspect every page.
If you change an image, its order or a PDF setting afterwards, create the PDF again. The old download is removed so it cannot silently give you an outdated document.
Save and find the PDF on your phone
First wait for Your PDF is ready, then tap Download PDF. Keep the tab open until the file has been saved. The steps below follow Google’s Android Chrome help and Apple’s iPhone user guide; the operating system’s menus can vary. They are not a claim that every device or OS version has been tested.
Android with Chrome
- Tap Download PDF in PixToPaper. If Chrome asks you to confirm a download or choose a location, complete that browser prompt.
- Open Chrome’s More → Downloads to find the saved file. With a bottom address bar, swipe up on the bar to find Downloads.
- You can also look in your device’s Files app. Open the PDF and check the pages before sharing it. Use the saved file’s Share action if you need to send it.
If a PDF viewer opens instead, use its download or save control. See Google’s Android download instructions for browser-specific help.
iPhone or iPad with Safari
- Tap Download PDF. If Safari opens the PDF, open Share; in some Safari layouts, open More first, then Share.
- Select Save to Files, choose the name and location, then tap Save.
- Open Files and go to the location you selected. For Safari downloads, check Browse → iCloud Drive → Downloads, or the alternative download location configured on your device. Safari’s Downloads button also shows recent downloads.
Apple explains saving a PDF from Safari and finding downloaded files. If you saved to iCloud Drive, Apple’s cloud service may sync that file: this is your save-location choice, separate from PixToPaper’s local conversion.
Creating the PDF alone does not save it. If a file is missing, return to the still-open PixToPaper tab and use Download PDF again before clearing the images or closing the tab.
Want one PDF per image instead?
Change PDF output to Individual PDFs — one per image, then select Create individual PDFs. Each image card provides its own Preview PDF and Download PDF controls. Save the files you need individually; there is no ZIP download.
Each file keeps its image name with the -pixtopaper suffix. If names would collide, a number is added so the files have distinct names. You can still crop or rotate an image and choose the same page settings before export.
If something does not work
- A file is rejected: check its format, size and pixel dimensions. Try opening it in an image viewer; a damaged file may need to be exported again.
- A phone runs out of memory or stops responding: try fewer or smaller images and close other heavy tabs. Compact may help export size, but it does not remove every decoding-memory limit.
- Text looks soft: use a sharper source, try Lossless quality, and do not stretch a small image over a large printed page. This tool does not add OCR or make image text selectable.
- An edge disappears: choose Fit the whole image, check any crop applied in the editor, and preview again.
- You cannot find a saved file: check your browser’s downloads or the device’s Files app. Make sure you used Download PDF rather than only Create PDF.
For a reproducible problem, report an issue with your browser, device and settings. Do not post private documents or personal information.
Sources and scope of this walkthrough
The converter steps and screenshots demonstrate PixToPaper’s browser workflow with labelled sample files. The phone save instructions draw on Google’s Android Chrome download help, Apple’s Safari PDF-saving guide and Apple’s downloaded-file guidance. Those browser and operating-system controls can change independently of PixToPaper.
This is not a claim that every physical phone or browser version has been tested. The page preview checks layout; the saved PDF is what you should inspect before sharing. Our testing and editorial approach explains how examples, sources and corrections are handled.
Read how these guides are produced and checked, or report a correction. Examples use demonstration files, not visitors' documents.