
Transparent PNG to PDF: why the background turns white
Learn why transparent PNG areas become white in PixToPaper PDFs, reproduce the result with a sample, and keep white logos readable before conversion.
By PixToPaper Team. Published .
On this page
PixToPaper flattens transparent PNG areas onto white when it creates a PDF. This happens with all three Image quality settings, including Lossless — larger file. If your artwork relies on a dark background, add that background in an image editor before conversion.
You can open the image-to-PDF converter to repeat the example below. If you need the complete upload-to-download walkthrough first, see how to convert images to PDF.
Is the background transparent or already white?
A PNG can store transparency information as well as color. A fully transparent pixel lets the background behind it show through; a partially transparent pixel blends with that background. Not every PNG is transparent, however. An image saved as PNG can still have an entirely opaque white rectangle around its artwork.
Image editors often display transparent areas over a checkerboard. That checkerboard is a display aid, not part of the PNG’s visible artwork. A screenshot of the editor can capture the checkerboard as ordinary pixels, so use the original image file rather than a screenshot of it.
To check your own file, open it in an editor that supports transparency and place a temporary colored layer underneath it:
- If the color shows through the corners, those corners are transparent.
- If the corners remain white, they contain white pixels rather than transparency.
- If a checkerboard remains visible even over the colored layer, the pattern may have been saved into the image itself.
An ordinary JPG with a white background already contains that white area. Converting it to PNG does not automatically remove the background or recover an earlier transparent version. For the broader source-format decision, see PNG vs JPG for PDF.
Compare the transparent source with the PDF output
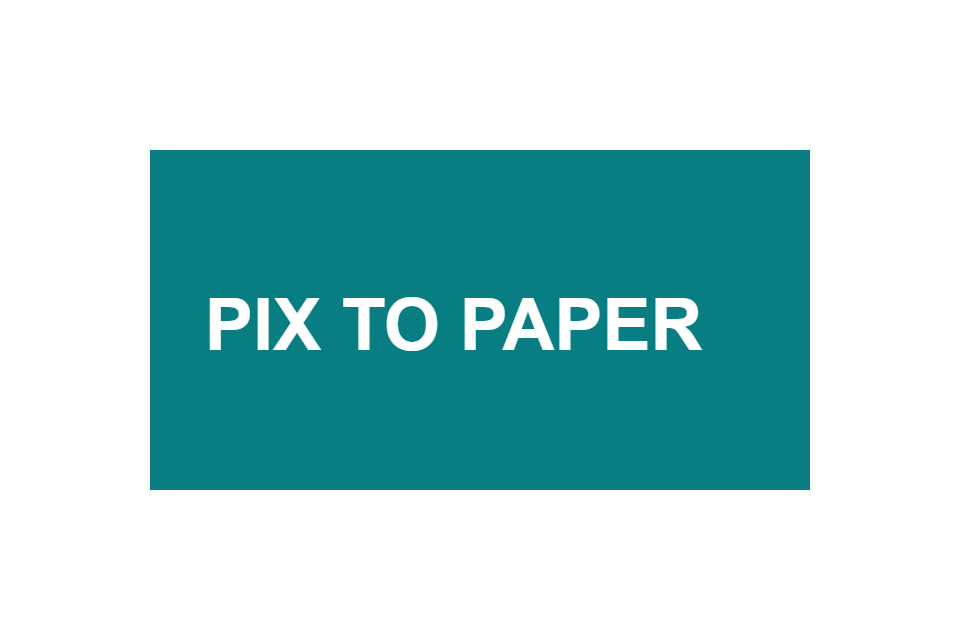
Our downloadable example is original generated demonstration artwork, not a customer’s logo or a photograph. The 960 × 640 pixel PNG has transparent corners, solid teal artwork and white lettering. The white lettering deliberately makes the white-on-white problem visible: lettering over teal remains distinguishable, while white lettering over transparent space blends into the white PDF background.
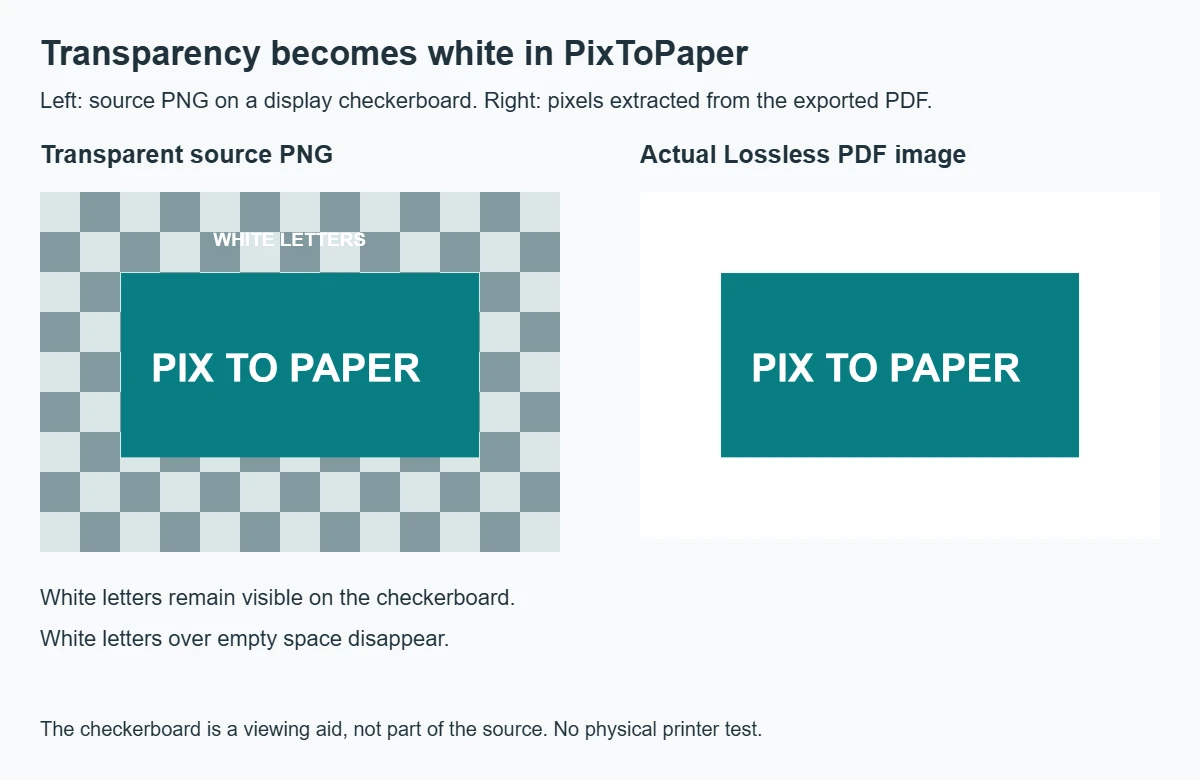
Use the transparent source PNG and Lossless sample PDF to compare the files yourself. Viewing the PNG against white alone will not reveal its transparent corners: white behind a transparent pixel and an opaque white pixel can look identical.
Repeat the conversion
- Save the 960 × 640 transparent PNG, then open PixToPaper.
- Select Choose images and add that PNG. Leave the image unedited so the comparison uses the same artwork.
- Open PDF settings. Set Page size to Match each image, Orientation to Automatic, and Margins (mm) to 0.
- Set Image placement to Fit the whole image and Image quality to Lossless — larger file.
- Select Preview pages to check the whole image and the white background.
- Select Create PDF, then Download PDF. Open the downloaded PDF and inspect both the corners and the white lettering outside the teal artwork.
The exported PDF is a white-backed page, not a transparent logo asset. Changing to High — balanced size or Compact — smaller file does not restore transparency. If you change any setting to compare results, select Create PDF again and download the new file.
This example isolates transparency: one small image, no edits and no margins. It does not establish how every image, PDF viewer or physical printer will reproduce colors. Inspect your own downloaded file before sharing it.
Why does Lossless still remove transparency?
In PixToPaper, Lossless — larger file means the rendered image is encoded as PNG without JPEG compression. It does not mean that the original source file, its alpha information or its bytes are copied unchanged into the PDF.
The converter renders the image over white before encoding it. Once a transparent area has been combined with that white background, choosing lossless encoding preserves the resulting white-backed pixels—not the original transparency. High and Compact use JPEG encoding for the rendered image, but the white-background step also applies to them.
Lossless is not a guarantee of unchanged source dimensions either: very large images can be downscaled within the converter’s rendering limits. Our 960 × 640 example is below those limits; its transparency change is separate from JPEG compression or resolution reduction.
This is PixToPaper’s export behavior, not a limitation of the PDF format. PDF can support transparency, but PixToPaper does not offer a preserve-alpha option or a selectable background color. Page size, orientation, margins and placement control layout; they do not turn transparency preservation on.
Keep white logos and light details readable
If an image was designed for a dark website, T-shirt mockup or presentation slide, its white lettering may depend on that background for contrast. The lettering has not necessarily been cropped or deleted when it disappears on a white page: white pixels against white simply have no visible contrast.
Prepare a separate delivery copy in an external image editor:
- Keep the original transparent PNG. Work on a duplicate rather than overwriting your reusable source asset.
- Add a solid background layer behind the artwork. Choose a color that contrasts with all important lettering and lines, not just the main shape.
- Check the whole image, including white text outside colored shapes and any faint or partially transparent edges. A background behind only the center of the logo may leave other details unreadable.
- Export the combined artwork and background as a new, opaque image. PNG is a useful choice for flat artwork and lettering because it avoids an extra JPEG-compression step.
- Add the new image to PixToPaper, select Fit the whole image, and check Preview pages. Create and open the downloaded PDF to confirm that every important detail remains visible.
The colored background will occupy the area included in your prepared image. If you choose a larger paper page or add margins, white page space can still surround it. Use A4 vs Letter: page size, margins and image fit when you need to plan that surrounding space.
If you need a transparent logo for reuse in a design application, keep and share the original PNG instead. A flattened PDF from this converter is not a replacement for that transparent asset.
Diagnose the result before changing quality
| What you see | What to check | Appropriate next step |
|---|---|---|
| White corners instead of an editor’s checkerboard | Whether the original corners are transparent | Expect white flattening in PixToPaper, or prepare a contrasting background externally. |
| White text disappears but teal artwork remains | Whether the text was meant to sit over a dark background | Add a contrasting background behind the entire artwork before conversion. |
| White rectangle remains around a JPG or opaque PNG | Whether the source already contains white pixels | Edit the source background if needed; changing the file extension will not remove it. |
| A checkerboard appears in the PDF itself | Whether you uploaded an editor screenshot or a PNG with a baked-in pattern | Use the original transparent file, not the screenshot or patterned copy. |
| An outer edge is missing | Whether Fill the page is cropping the image | Try Fit the whole image and preview again; cropping is a separate issue from transparency. |
Increasing quality will not make white-on-white artwork readable. Fix the contrast in the prepared source first, then choose quality for the sharpness and file size you need.
Source and editorial limits
The W3C PNG specification, section 6.2: Alpha representation explains how PNG stores transparency, including fully transparent, partially transparent and fully opaque pixels. A PNG extension alone does not establish that a particular image has transparent areas.
The downloadable example and comparison illustrate PixToPaper’s white-background export using original generated artwork. They are not a physical print evaluation, a color-accuracy certification or a guarantee about other converters. The specification is a technical reference, not an endorsement of PixToPaper. Our editorial method explains how we distinguish product behavior, reproducible examples and limitations.
Read how these guides are produced and checked, or report a correction. Examples use demonstration files, not visitors' documents.